
These easy mini egg chocolate brownies are rich, fudgy, and slightly chewy at the edge, just as a perfect brownie should be, and the recipe couldn’t be easier. The perfect Easter treat.

Easy mini egg chocolate brownies recipe
Mini eggs are surely one of everyone’s favourite childhood treats. Delicious milk chocolate coated in a crisp sugar shell in the pretty pastel shades of songbird eggs.
For my easy mini egg brownies, I have combined them with a classic cocoa brownie recipe. These Easter brownies are chewy at the edges, soft and fudgy in the middle, with chunks of chocolate and the light crisp bite of that sugar coating.
This recipe is one of the easiest you can make. I like my baking to be effortless but with reliably impressive results. These mini egg brownies are effortless and fuss free, with one bowl, one spoon or spatula, and one baking tray. I do like to keep washing up to a minimum!
These brownies are a variation of my easy blondies recipe, where I swapped some of the flour for cocoa powder.
This is a great recipe to make with children and the brownies are just the thing to serve at an Easter egg hunt!

Small batch mini egg brownies
Many traybake recipes are intended to feed a crowd. I like to bake in smaller batches. Most of the time, I cook for two and while I enjoy making treats for visitors, I don’t want to be left with enough cake to feed an army. I hate food waste and I don’t want to be tempted to overeat.
These brownies nicely fill a regular 8″ / 20 cm square pan. This makes 12–16 servings which will keep for up to a week. That’s generally enough if you are putting on a spread for a few guests but you can double the recipe for a big party, or bake sale and use a standard 9″ x 13″ pan.
What are brownies?
A classic American tray bake, brownies have a soft fudgy consistency on the inside but a papery crust. They lend themselves well to parties as they are indulgent but can be picked up and eaten without creating too much mess.
When they are still warm from the oven, they also lend themselves to serving as a dessert with a scoop of ice cream.
Why you will love this mini egg brownies recipe
- They are so easy, with only the most basic equipment and very little washing up!
- No fuss and effortlessly impressive.
- They feel celebratory and are perfect for Easter or a birthday party.
- A one bowl bake – no need for whisking!
- The decoration is built in so there’s no need for icing and decorating.
- Brownies keep well in a tin, so you can make them in advance.
- Scale the recipe up if you’re expecting a crowd.
Ingredients

- Flour – I use plain with a pinch of baking powder but if you normally use SR, that’s fine too.
Pro Tip – Why Bake with Plain Flour?
I’m often asked why I bake with plain flour and add a raising agent rather than use self raising.
First – I don’t bake that often, and the raising agent in the flour can go off. If you use a separate baking powder it is really easy to check that it is still fresh.
Secondly – My kitchen is tiny! If I keep both types of flour, it takes up more space.
- Soft brown sugar – This has more flavour than white sugar and I prefer it.
- Butter – Regular supermarket butter. I use salted. If using unsalted, add a pinch of salt too, as it rounds off the flavour.
- Egg – One large free range egg
- Cocoa power – which ever you have, regular supermarket brand cocoa powder is fine.
- Mini eggs – The solid chocolate ones with the sugar shell. Cadbury’s are the most widely available in this country.
- Vanilla extract – Vanilla extract is natural vanilla. Vanilla essence is generally synthetic. I like the vanilla paste which contains the seeds from the vanilla pod but you can use a liquid version if you prefer. Adjust the quantity according to how potent it is.
- Baking Powder – If you don’t bake very often or if your powder is past its expiry date, check your baking powder is fresh. It is usually good for months, even years after the expiry, but it is best to check if you are unsure.
How to make easy mini egg brownies – step by step
First, preheat your oven to 180°C / 160°C Fan / Gas 4. Prepare an 8″ / 20 cm square baking tin by lining it with baking parchment, and then greasing with butter or a light flavourless oil.
I prefer foil backed parchment for this job. It is pricier but it is so much easier to use because I find it stays put when you fold it. You can use a couple of fold back clips to hold unruly baking parchment in place.

Step One – Melt the butter. You can do this either in a saucepan or in a large bowl. I like to use a jug in the microwave. Don’t let your butter get too warm. You want it melted but not hot.
Top tip
I find the easiest way to melt butter is in the microwave. Depending on the power of your microwave, half melt it and then take it out and stir until it’s all liquid. By doing this rather than trying to melt it all, you avoid burning or overheating it.

Step Two – Next, add the sugar. Stir it in well.

Step Three – Add the egg and vanilla extract and stir in.

Step Four – Sift in the cocoa powder. While modern flour rarely has lumps, cocoa does. Use a sieve so you don’t have lumps of cocoa in the final bake!

Step Five – Now add the flour, together with any other dry ingredients (baking powder and salt if using). Fold in to create a smooth, glossy batter.

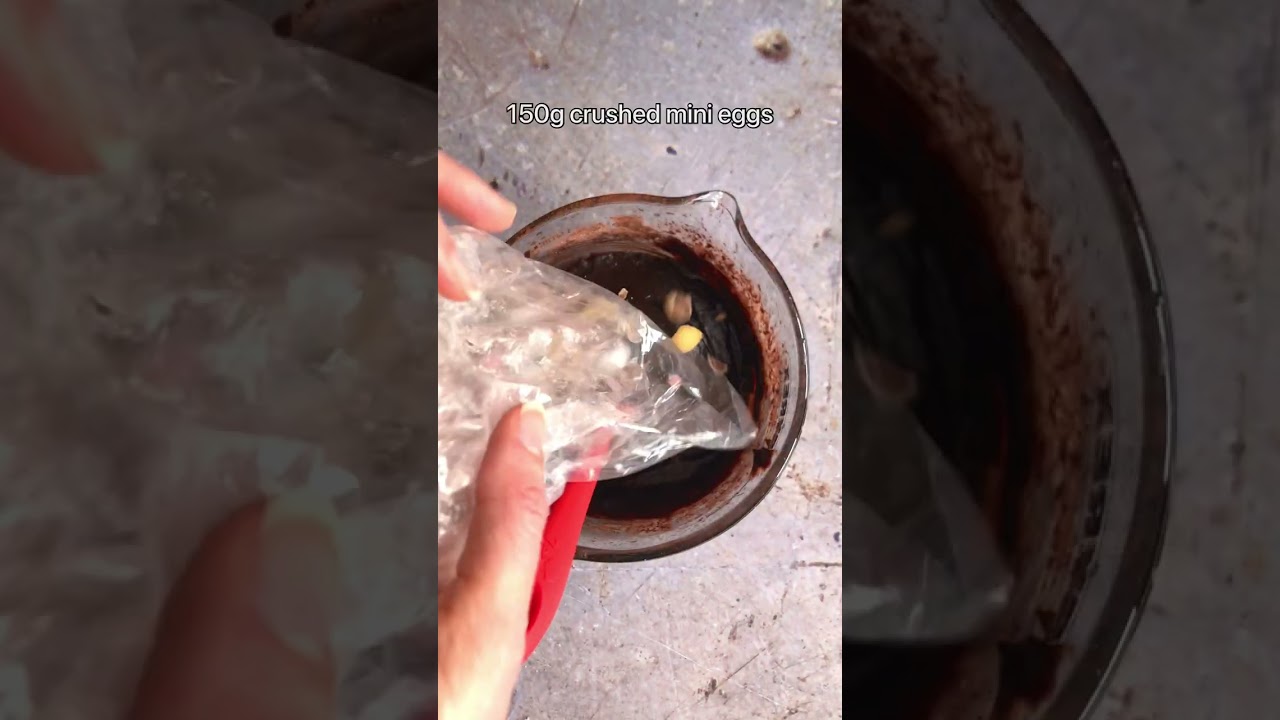
Step Six – Now break up the mini eggs. There are two ways to do this. You can put them on a chopping board and lightly crush them with the base of a glass, or empty jar. Alternatively (and more child-friendly) you can seal them in a plastic bag before smashing them up with a rolling pin!

Step Seven – Add 2/3 of the bashed up mini eggs to the brownie mix and stir through.

Step Eight – Transfer the batter to the prepared baking tray. Then smooth out with the back of the spatula, pushing the batter into the corners of the pan.
Scatter the remaining smashed mini eggs over the top. The bigger pieces of egg will sink into the brownie as it bakes, but smaller pieces will remain on the top.

Step Nine – Bake for 25–28 minutes, until a papery crust forms, and the edges have risen and are slightly wrinkled. The centre will still be soft, barely set, and will have a wobble if you (gently) shake the pan.
If you don’t have a fan oven you may need to turn the pan halfway through cooking to compensate for any hot spots. Do this as quickly and as gently as you can.
Allow to cool and firm up for at least 20 minutes on a wire rack before cutting your brownies up, and removing from the baking parchment. The centre will carry on cooking as it cools.

Step Ten – Finally, when the bake is cool, cut your mini Easter egg brownies into squares, ready to serve. I find a 4 x 4 grid of 16 pieces is perfect.

Storage
You can store your brownies for up to 5 days. I wrap them in the baking parchment I used for baking, before sealing them in an airtight tin. For a just baked taste, pop into the microwave for 10 seconds to warm up. This will restore that delicious soft centre.
You can also wrap your brownies well and freeze for up to 3 months.
Variations
- This brownies recipe is intensely chocolatey, which despite the sugar makes them not too sweet. If you prefer a lighter, milk chocolate style, remove a heaped dessert spoon of the cocoa and replace with the same volume of flour.
Hints and tips
- For a fabulous Easter dessert, try serving warm with a scoop of ice cream.
- If you want to double the recipe use a 13 x 9″ baking pan. Your Easter brownies will be a bit deeper and take slightly longer to cook.
- This recipe has proportionally more fat in it compared to many bakes. It is important to take time to stir the flour in well to prevent any separation.
- Use real butter! Baking spread has its place but it is not here.
- Good quality vanilla extract makes a massive difference. Vanilla extract contains real vanilla, while essence is often synthetically made and contains little or no actual vanilla.
FAQs
You need to check the packet, because they vary. The current recipe for the Cadbury ones is vegetarian.
Why not? Follow my easy blondie recipe and then follow this one from Step Six.
More mini egg recipes
- Mini egg fridge cake – Such an easy way to make a delicious chocolate slice
- Mini egg ice cream – The lightest, fluffiest chocolate ice cream with mini egg crunch!
- Mini egg fudge – Creamy, delicious and pretty as a picture
More Easter treats
- Easy creme egg brownies – Effortless one-bowl brownies with delicious creme eggs
- Easy creme egg blondies – Gorgeous one-bowl creme egg blondies
- Mini Easter cakes – Adorable teatime treats
- Creme egg cheesecakes – Effortless entertaining
- Creme egg fondue – An indulgent dessert

Easy Easter Mini Egg Brownies
Ingredients
- 115 g butter (melted)
- 210 g light soft brown sugar (or dark)
- 1 large egg
- 1 tsp vanilla extract
- 45 g cocoa powder
- 55 g plain flour
- 1 tsp baking powder (leave it out if you use SR flour)
- 1 pinch salt (optional, if using unsalted butter)
- 150 g mini eggs
Instructions
- Preheat your oven to 180°C / 160°C Fan / Gas 4. Prepare an 8" / 20 cm square baking tin by lining with parchment paper, and then greasing with butter, a light flavourless oil or a spritz of cake release spray.
- Put the butter into a large bowl or jug. Melt it in the microwave in 10 seconds bursts. Continue until the butter is melted but not hot. If you prefer, you can melt the butter over a pan of simmering water on the stove top.115 g butter
- Add the soft brown sugar to the jug and stir it in.210 g light soft brown sugar
- Beat in the egg and vanilla.1 large egg, 1 tsp vanilla extract
- Sift the cocoa into the mix. Then add the flour, together with the baking powder and salt (if using). Fold in and mix until you have a thick glossy batter.45 g cocoa powder, 55 g plain flour, 1 tsp baking powder, 1 pinch salt
- Break up the mini eggs. Crush them under a jar on a board, or put them in a plastic bag and smash with a rolling pin.150 g mini eggs
- Reserve about a third of the egg pieces. Stir the rest into the mixture.
- Pour the batter into the prepared baking pan. Give it a gentle shake to level it out.
- Scatter the remaining mini egg pieces over the mixture.
- Bake for 25–28* minutes, until the brownies are set at the edges (which will have risen and become slightly wrinkled). There will be a shiny papery crust on top. The middle should be soft and still slightly wobbly. *If you don't have a fan oven you may need to turn the pan half way through cooking if your oven has hot spots. Do this as quickly and as gently as you can.
- Stand the tin on a wire rack and allow to cool for 10–15 minutes to firm up (the centre will continue to cook in the residual heat). Then gently lift out of the pan and cut into 16 squares (4 x 4 pattern).
Notes
- Store for up to 5 days. I find the best way is to wrap your brownies in the baking parchment you used for baking, before sealing them in an airtight tin. For that just baked taste pop into the microwave for 10 seconds to warm up and restore that delicious fudge centre.
- You can also wrap well and freeze for 3 months, but we never had any left over after a few days.
- For the a delicious brownie dessert, try serving the warmed brownies with ice cream.
- To double the recipe – use a 13 x 9″ baking pan. The brownies will be a bit thicker and take slightly longer to cook.
- This recipe has proportionally more fat in it compared to many bakes. Take time to stir the dry ingredients in properly to prevent any separation.
- Use proper butter!
- Good quality vanilla extract makes a massive difference. Vanilla extract contains real vanilla, while essence is often synthetically made and contains little or no actual vanilla.
- This recipe is 7 Weight Watchers Smart Points
Video


Leave a Reply